

Prerequisites
- Node.js 20+ installed
- A GrowthBook account
- A Sanity account
- Basic knowledge of Next.js and React
Video Tutorial
Set up Next.js and Sanity
Install Next.js
Already have a Next.js project? Skip to the next section.Install Sanity
Inside your Next.js project, install Sanity:/studio) and sets up the necessary config files.
Free Sanity account requiredYou’ll need a free Sanity account to complete this guide, if you do not yet have one, you will be prompted to create one after running this command.
Add the Sanity Personalization Plugin
Sanity offers a plugin for personalization that includes a direct integration with GrowthBook. This plugin allows you to create content variations within Sanity and use GrowthBook for feature flag experiments. Install the plugin:Update your Sanity config
In your Next.js project, updatesanity.config.ts to include the personalization plugin. Note that the fields listed below are the existing defined fields that you are extending to be able to experiment on. (Changes highlighted in the code block below.)
Add Experiment Fields to Your Sanity Schema
With the personalization plugin installed, you can now add experiment fields to your Sanity schema. Create a new filesanity/schemaTypes/camera.ts:
experimentString and experimentImage field types (highlighted in the code block above) provided by the personalization plugin. These allow you to create content variations with Sanity and use GrowthBook for experiments.
Import the schema into your sanity/schemaTypes.ts file:
Add Queries to Fetch Experiment Content
Create a new filesanity/lib/queries.ts to store your GROQ query:
Configure GrowthBook
In this section, we’ll create an SDK connection, feature flag, and experiment in GrowthBook.- The SDK connection links GrowthBook to your Next.js app.
- Feature flags live in your codebase and control which code is executed.
- Experiments are defined as feature flag rules and are used to test different variations.
Create a GrowthBook SDK Connection
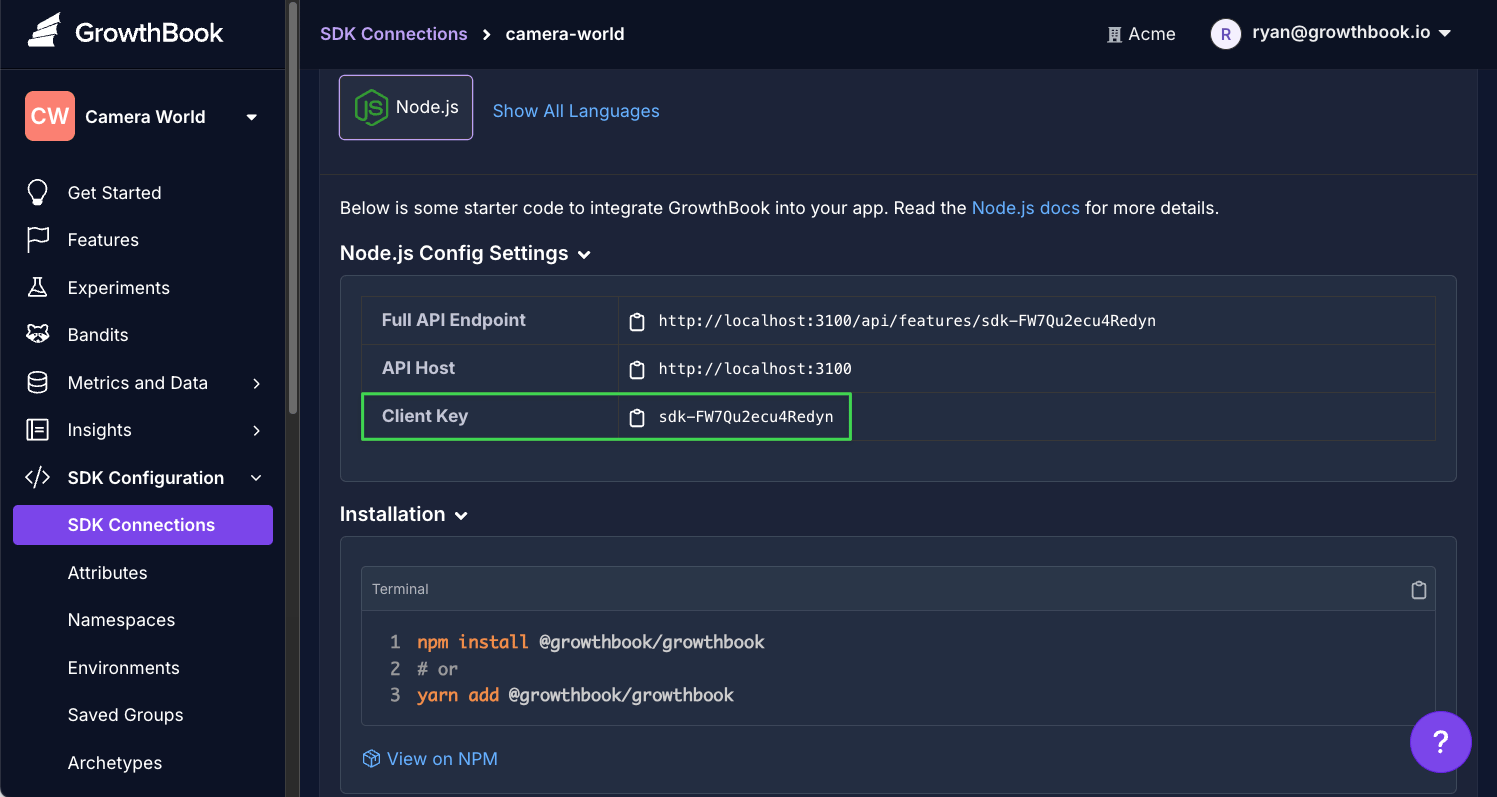
- In GrowthBook, go to SDK Configuration → SDK Connections and click Add SDK Connection.
- Choose Node.js and click Save.
-
Copy the Client Key and add it to your
.env.localin Next.js. (You’ll also see the environment variables for Sanity in the file.)
Create a Feature Flag
For our Camera World example, let’s test the title, description, and image for the Sony A7 IV product page.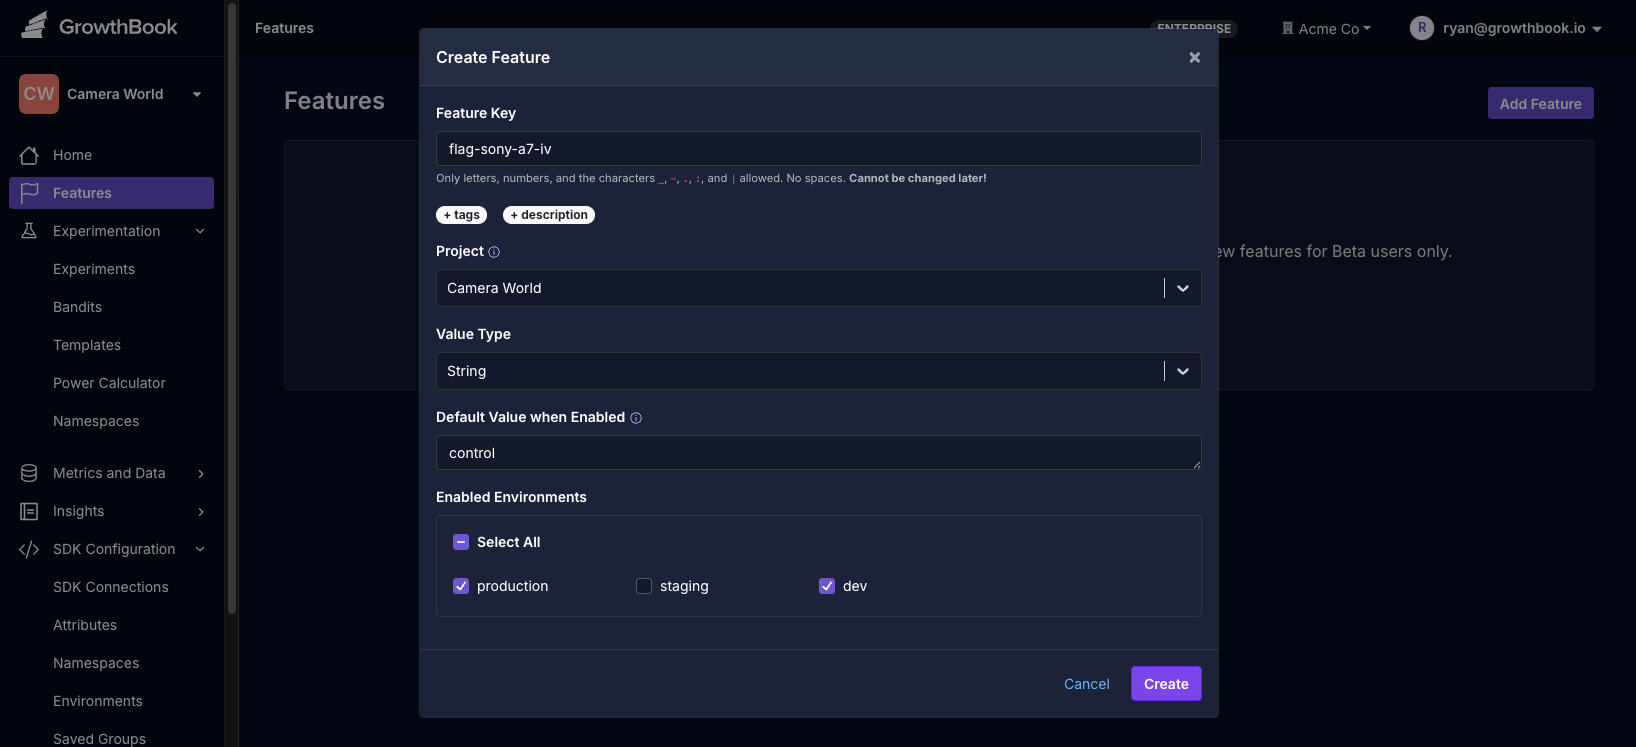
- In GrowthBook, go to Features and click Add Feature.
-
Give the feature a name, like
flag-sony-a7-iv. - Set the value type to String.
- Set the default value to “control”.
- Save the feature.
Create an Experiment
With the feature flag created, we can now create an experiment.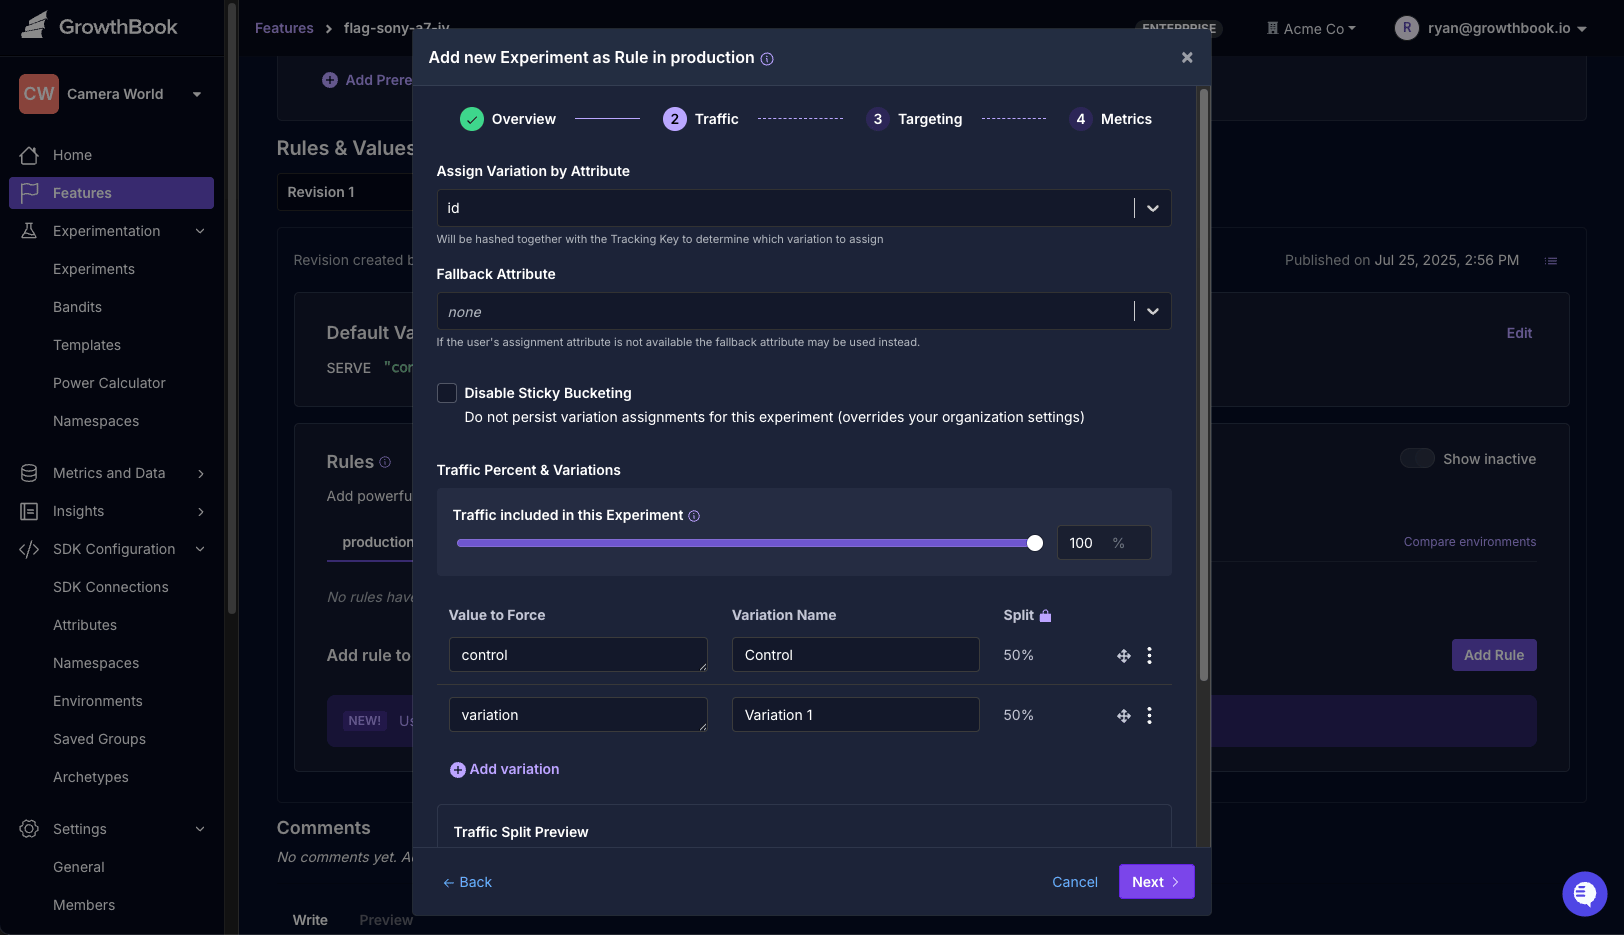
- On the same page, scroll down to Rules and click Add Rule.
- Select Experiment.
- Configure your experiment:
- Name: “Sony A7 IV Experiment”
- Control: “control”
- Variation 1: “variation”
- Complete remaining steps and save.
- Click Review and Publish to launch the experiment.
Create an API Key
- In GrowthBook, go to Settings → API Keys
- Click New Secret Key
- Add a description, like
Sanity API Key. - Set the role to readonly.
- Save and copy the API key for the next step.
Add Content Variations with Sanity
In Sanity Studio, we’ll open theCamera Product document for the Sony A7 IV. While our control uses matter-of-fact language, the variation will be more exciting.
API key requiredThe first time you open document an experiment field, you’ll be prompted to enter the API key you created in the previous step.
- Add your default content.
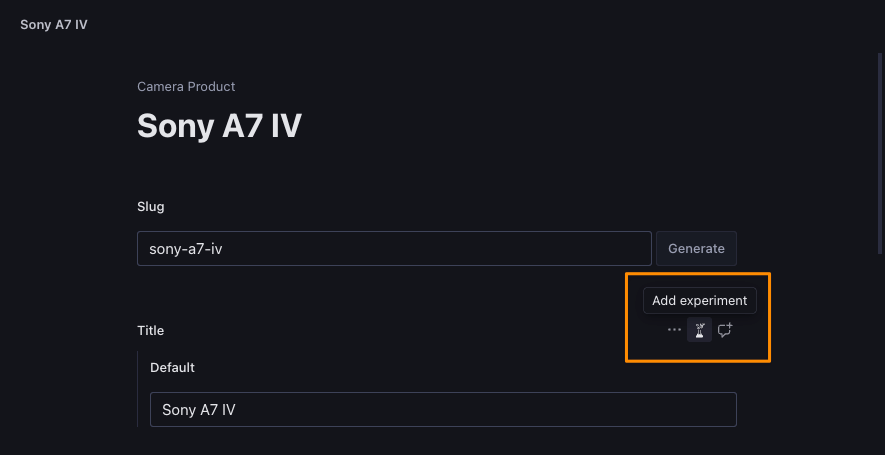
- Hover over the Title, Description, and Image fields to reveal an experiment (flask) icon.
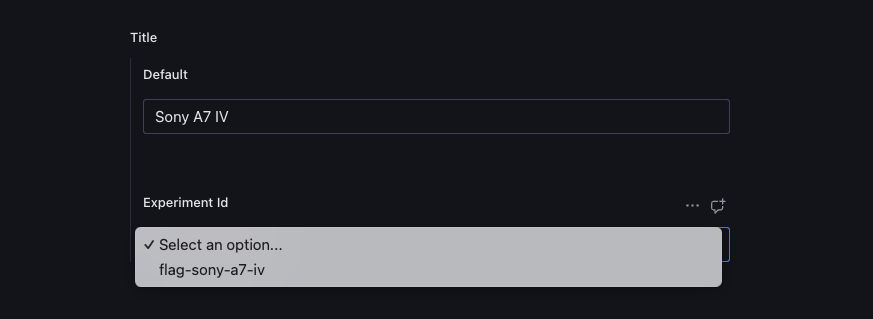
- Click the experiment icon to open a dropdown where you can select the experiment you created in GrowthBook.
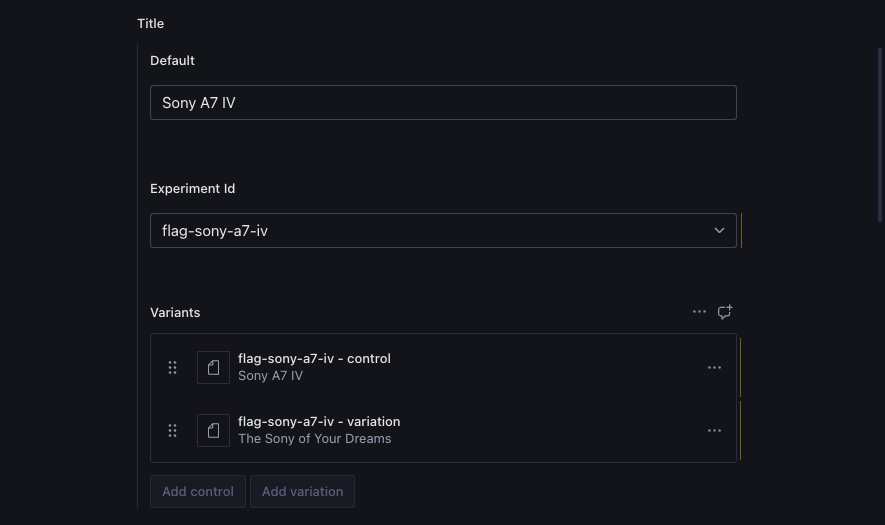
- Add content for each variation:
- Control: Your default content
- Variation: Alternative title/image to test
- Publish content!
Add GrowthBook to Your Next.js App
Now, let’s integrate GrowthBook in your Next.js app to serve the appropriate content to the user.Install GrowthBook
Configure GrowthBook for Server-Side Rendering
Create a new file,lib/growthbookServer.ts:
Configure Experiment Tracking
To track experiment exposures—which variations a users saw—we’ll need to create a tracking component. Create a new file,lib/growthbookTracking.tsx.
Note the TODO comment. You’ll need to replace the console.log with your own event tracking. Popular event tracking tools include Google Analytics, Segment, and Jitsu.
Update Middleware for Consistent User IDs
Create or updatemiddleware.ts in your project root to ensure consistent experiment assignment.
Bring Everything Together in Your Next.js App
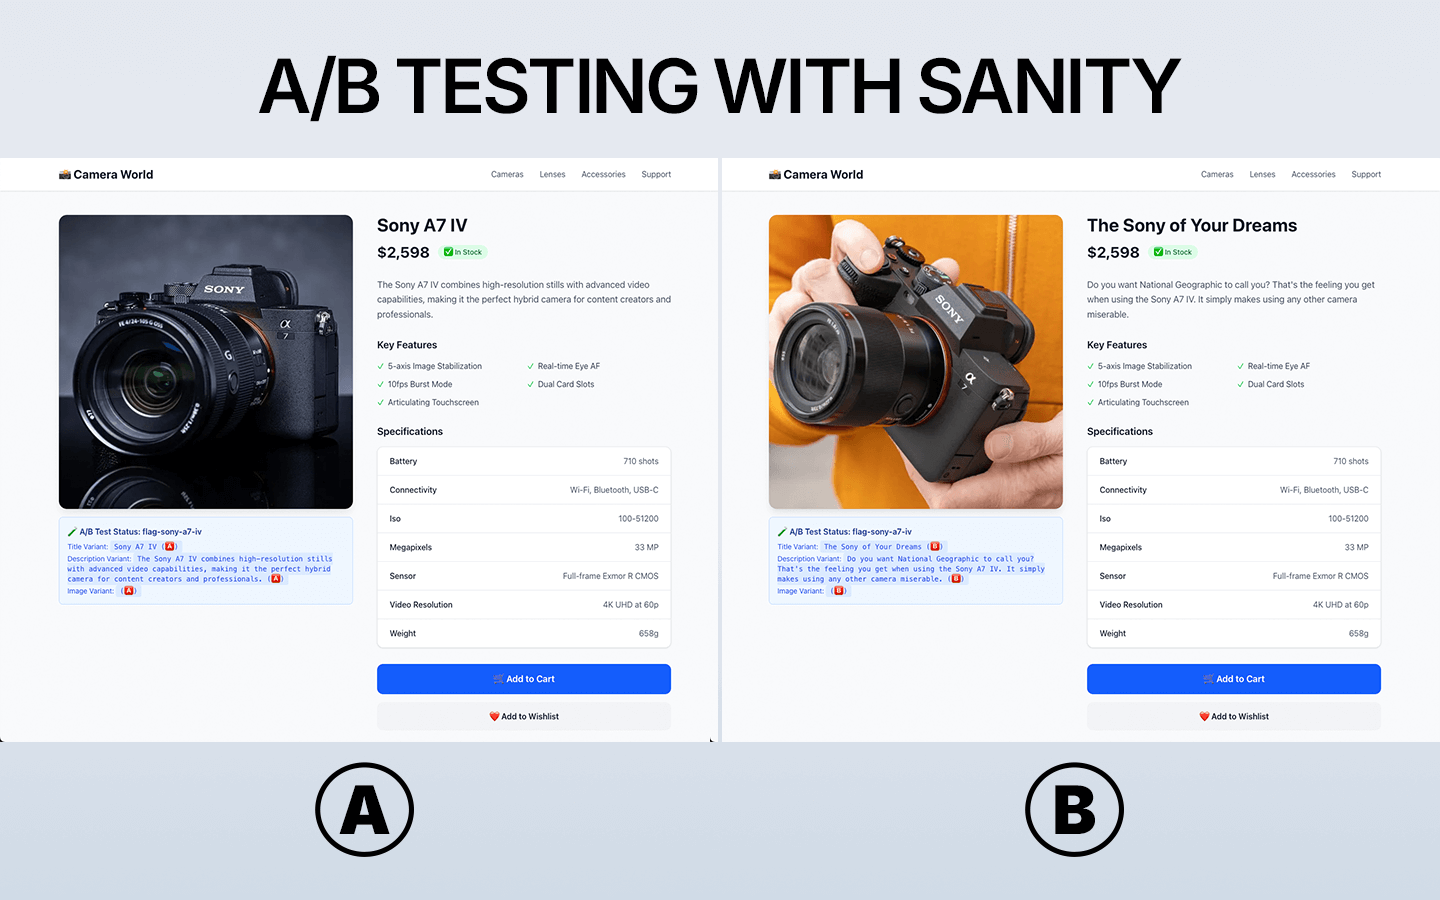
Now let’s create a page that demonstrates the A/B testing functionality. It’s a dynamic route that fetches the product data from Sanity and serves the appropriate content to the user. The relevant part of the template is highlighted in the code block below.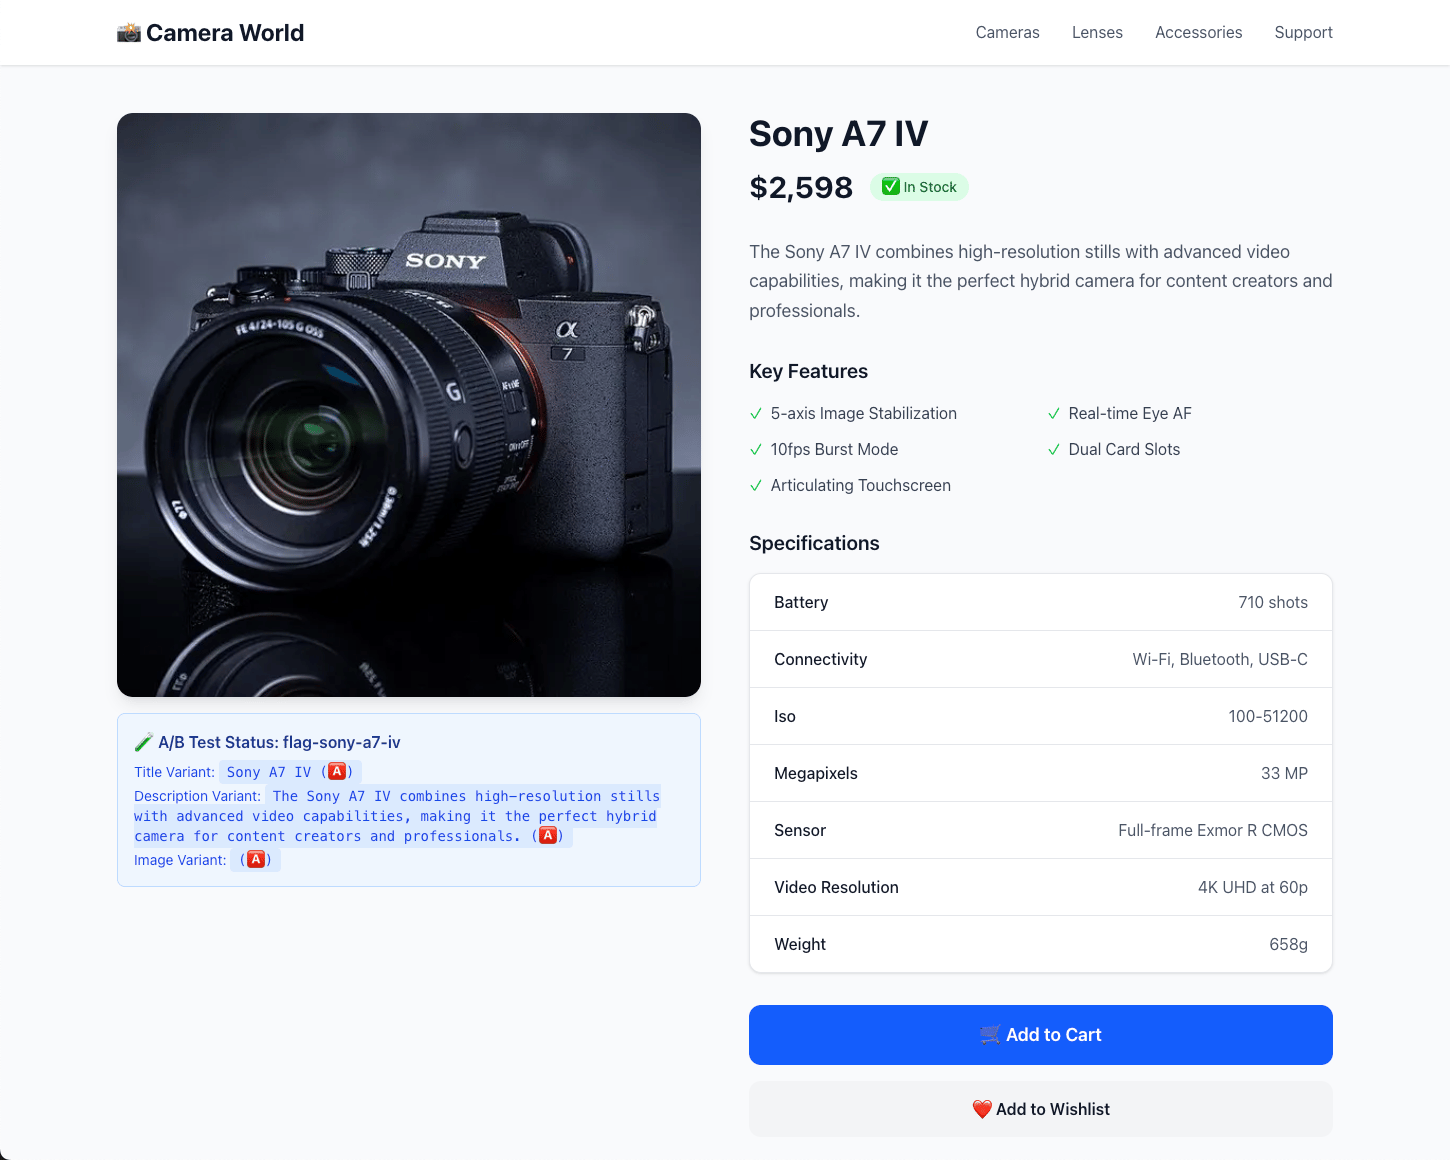
Sanity experiment: Control
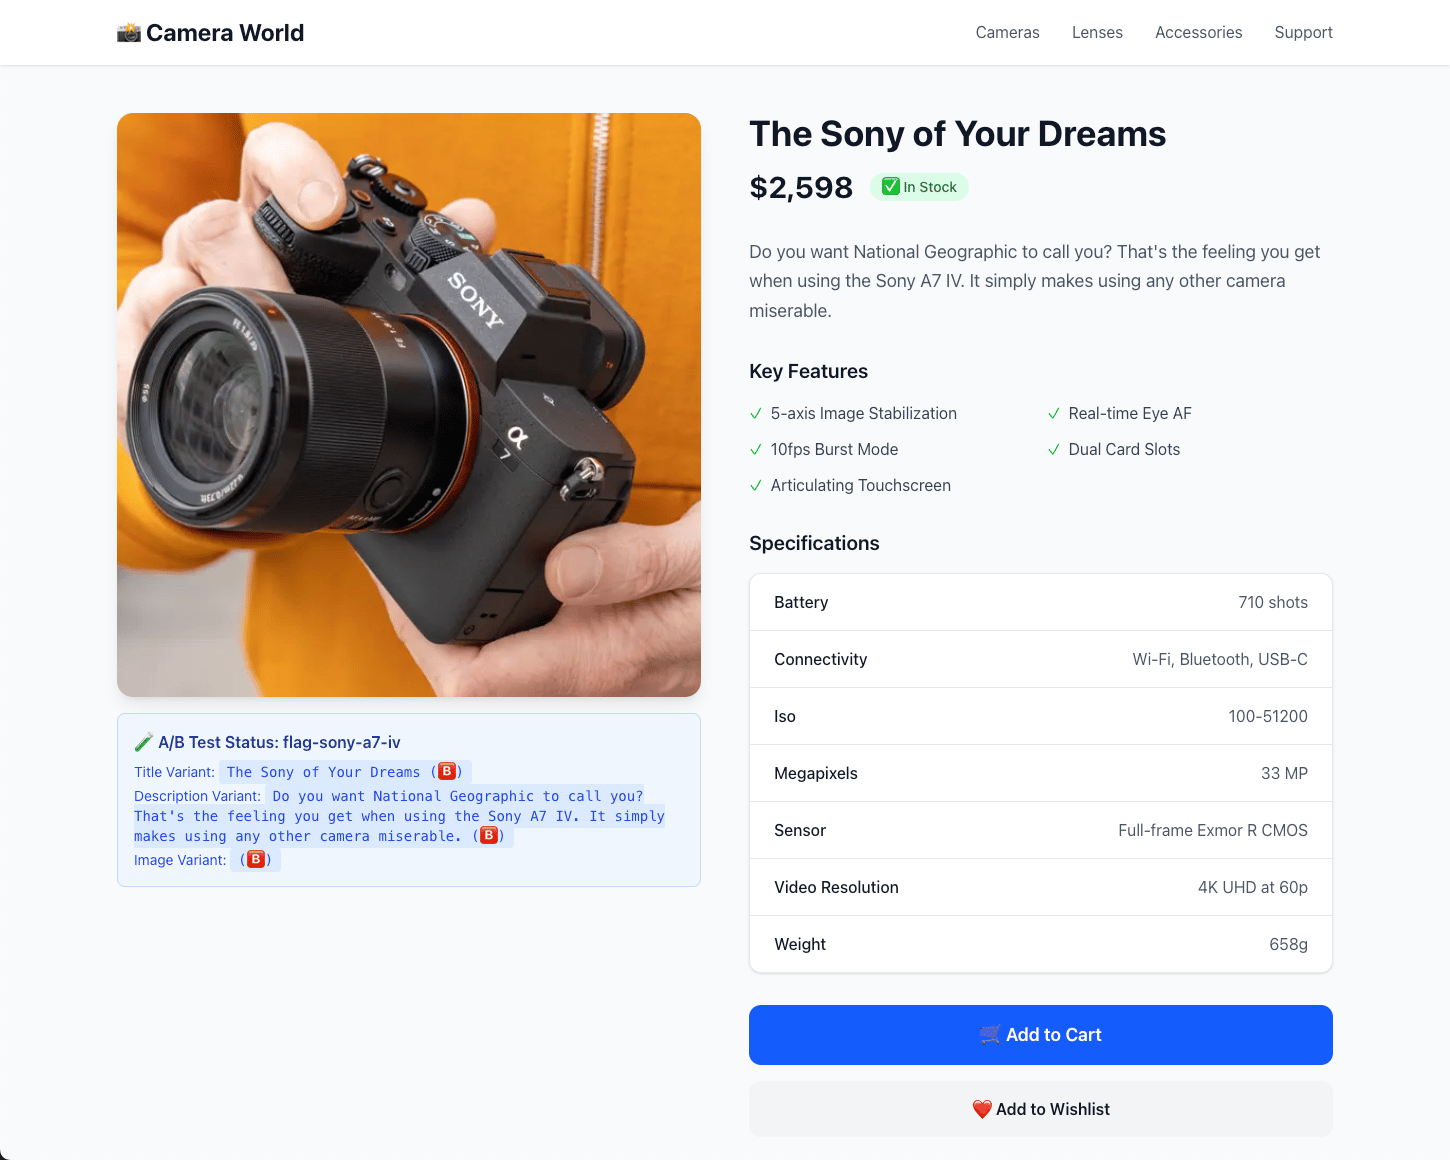
Sanity experiment: Variation
Create an Experiment Page
Editapp/[slug]/page.tsx:
Testing Your Setup
With your Next.js app running, you can now test the A/B testing functionality. Visit the app in your browser to see which variation is being served. Even when you refresh the page, the same variation will be served to the user. Check your console to see debug info.Next Steps
- Add Event Tracking: Replace the
console.logwith your analytics service (Google Analytics, Segment, etc.) See docs for more details. - Add Metrics: Add metrics to your experiment to track conversions, revenue, etc.
- Configure Webhooks: Set up GrowthBook webhooks to revalidate your Next.js cache when experiments change
Troubleshooting
- No variations showing: Check that your GrowthBook client key is correct and the experiment is published.
- Console errors: Check that all environment variables are set correctly.
- Other issues: Restart your Next.js app and open an incognito window to test.