> ## Documentation Index
> Fetch the complete documentation index at: https://docs2.growthbook.io/llms.txt
> Use this file to discover all available pages before exploring further.
# Webflow
# Webflow Integration
Unleash the power of experimentation with GrowthBook to supercharge your Webflow site—no coding skills required!
**Note**
This guide walks you through creating experiments using the GrowthBook Visual Editor, which requires a `Pro` subscription. [Learn More](https://www.growthbook.io/pricing).
## Let's Get Started
### Step 1: Create a GrowthBook SDK Connection
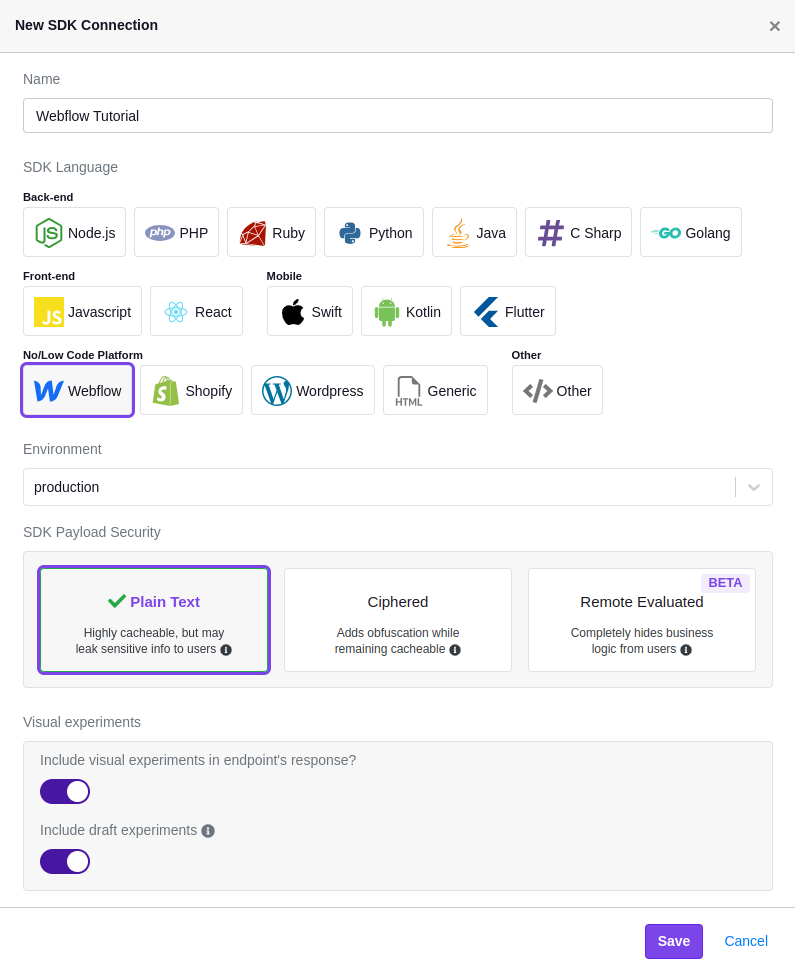
To connect your GrowthBook account to Webflow, you'll need to create a new SDK Connection and select the `Webflow` option. Before saving, confirm that you've enabled the toggles for `Include visual experiments in endpoint's response?` and `Include draft experiments`.
 ### Step 2: Add GrowthBook to Your Webflow Site
Once the SDK Connection is created, you should see a code snippet that you need to add to your site.
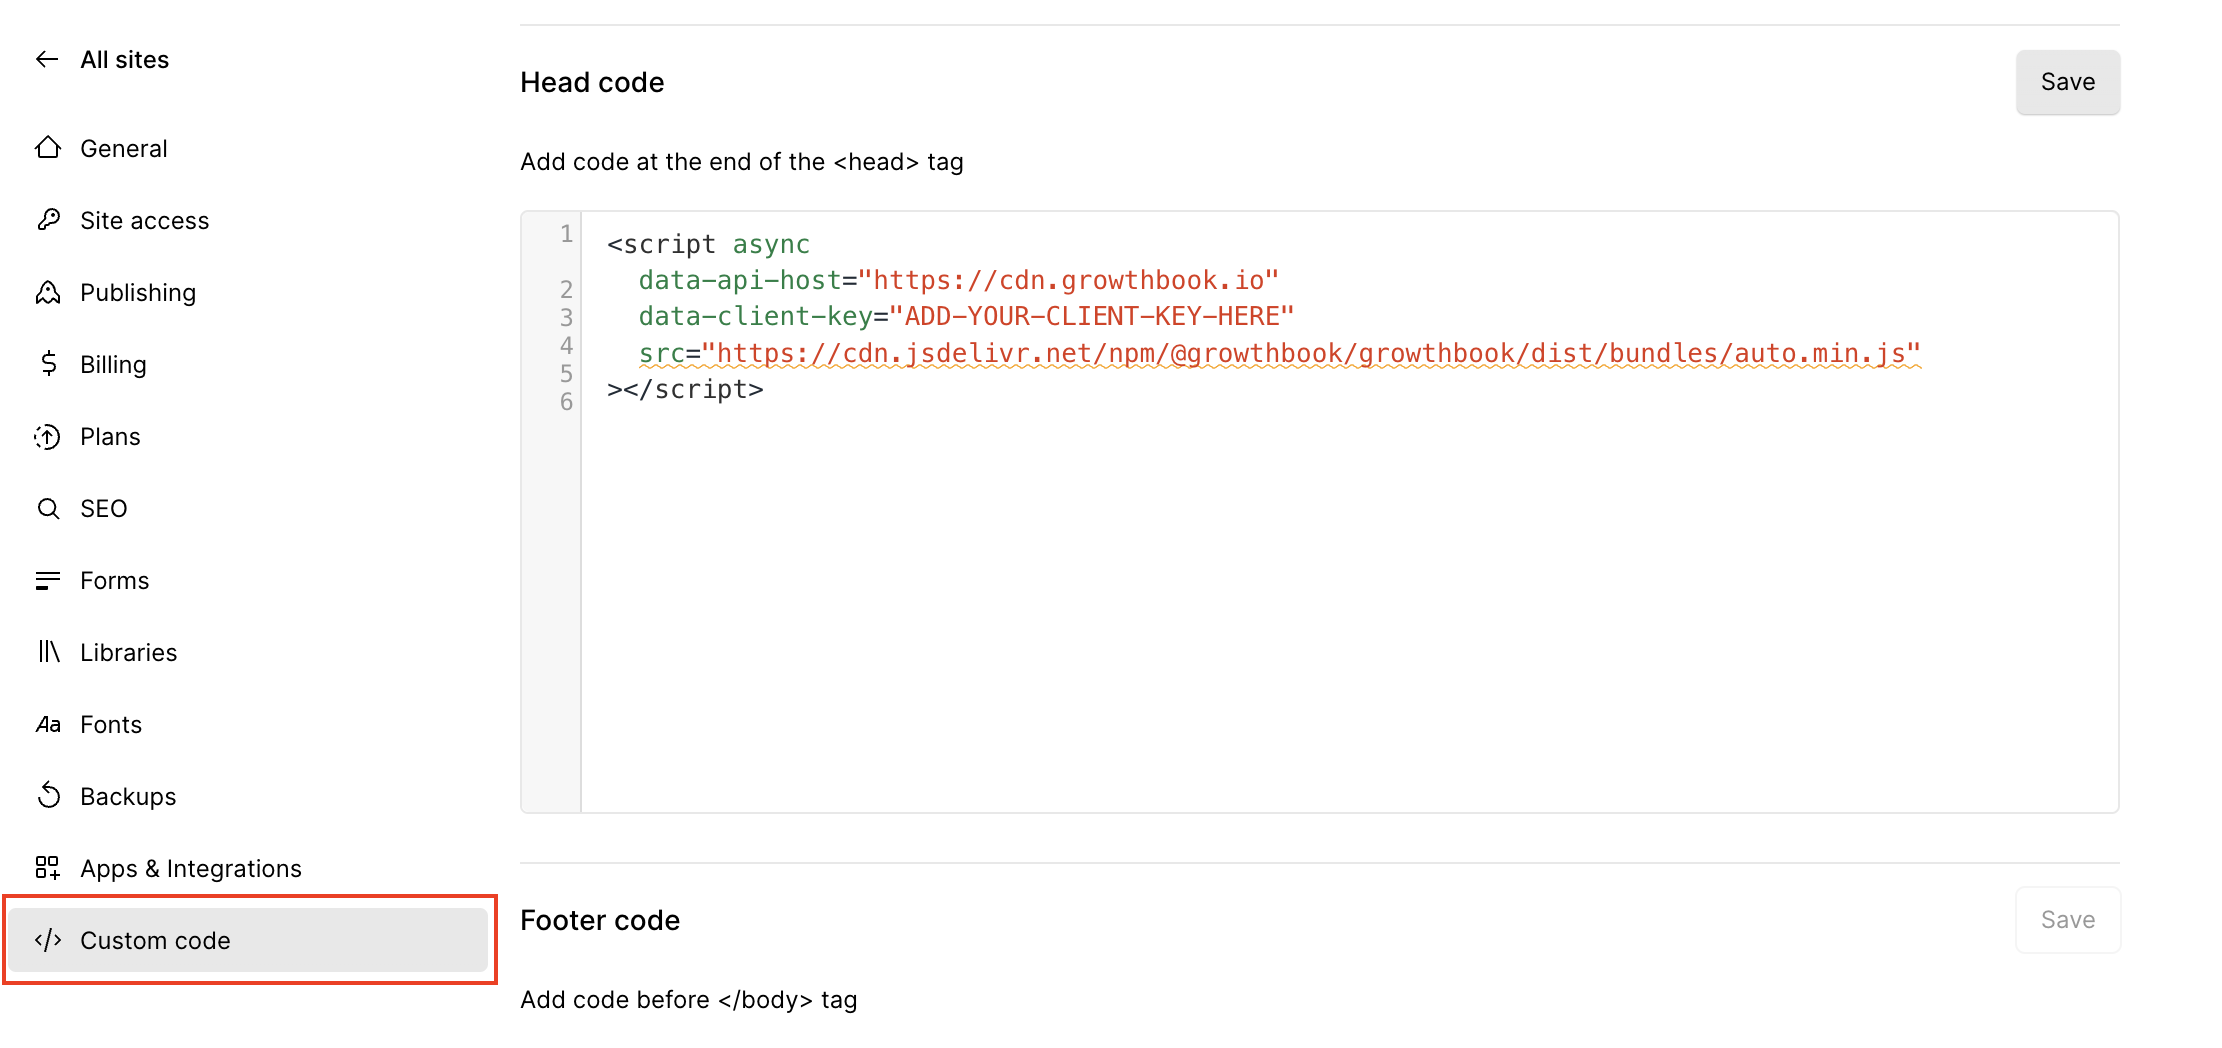
In a new window, log into your Webflow account, navigate to your site's settings, and select the `Custom Code` tab.
Find the "Head Code" section, and paste in the code snippet from GrowthBook. It should look something like this:
### Step 2: Add GrowthBook to Your Webflow Site
Once the SDK Connection is created, you should see a code snippet that you need to add to your site.
In a new window, log into your Webflow account, navigate to your site's settings, and select the `Custom Code` tab.
Find the "Head Code" section, and paste in the code snippet from GrowthBook. It should look something like this:
 **Tracking experiment views**
When a user views an experiment, the code above will fire an event that tracks which variation the user saw. If you have Google Analytics 4 (GA4) or Segment installed on your site, you don't have to do any additional configuration. If, however, you need to use a different analytics provider, you can follow our guide [here](/lib/script-tag).
Once added, save and publish the changes and navigate back to GrowthBook.
### Step 3: Install the GrowthBook Visual Editor
Install the [GrowthBook Visual Editor](https://chromewebstore.google.com/detail/growthbook-visual-editor/nbomejknbpkcpjdagefhichaajpoempk) from the Chrome Web Store, then open the side panel and click **Connect with GrowthBook**. See [Install and connect](/app/visual/install-and-connect) for the full setup.
### Step 4: Create a GrowthBook Visual Editor Experiment
**Questions about the Visual Editor?**
If you have questions about how to use the Visual Editor, [check out our guide here](/app/visual).
Now that GrowthBook is installed on your Webflow site, you can create a new experiment using the Visual Editor.
First, navigate to "Experiments" on the left-hand navigation menu and then click "Create Experiment", before selecting "Design a New Experiment" and following the on-screen prompts.
Once you've created your experiment, select "Visual Editor" as the editor type and enter the URL of your Webflow site.
**Tracking experiment views**
When a user views an experiment, the code above will fire an event that tracks which variation the user saw. If you have Google Analytics 4 (GA4) or Segment installed on your site, you don't have to do any additional configuration. If, however, you need to use a different analytics provider, you can follow our guide [here](/lib/script-tag).
Once added, save and publish the changes and navigate back to GrowthBook.
### Step 3: Install the GrowthBook Visual Editor
Install the [GrowthBook Visual Editor](https://chromewebstore.google.com/detail/growthbook-visual-editor/nbomejknbpkcpjdagefhichaajpoempk) from the Chrome Web Store, then open the side panel and click **Connect with GrowthBook**. See [Install and connect](/app/visual/install-and-connect) for the full setup.
### Step 4: Create a GrowthBook Visual Editor Experiment
**Questions about the Visual Editor?**
If you have questions about how to use the Visual Editor, [check out our guide here](/app/visual).
Now that GrowthBook is installed on your Webflow site, you can create a new experiment using the Visual Editor.
First, navigate to "Experiments" on the left-hand navigation menu and then click "Create Experiment", before selecting "Design a New Experiment" and following the on-screen prompts.
Once you've created your experiment, select "Visual Editor" as the editor type and enter the URL of your Webflow site.
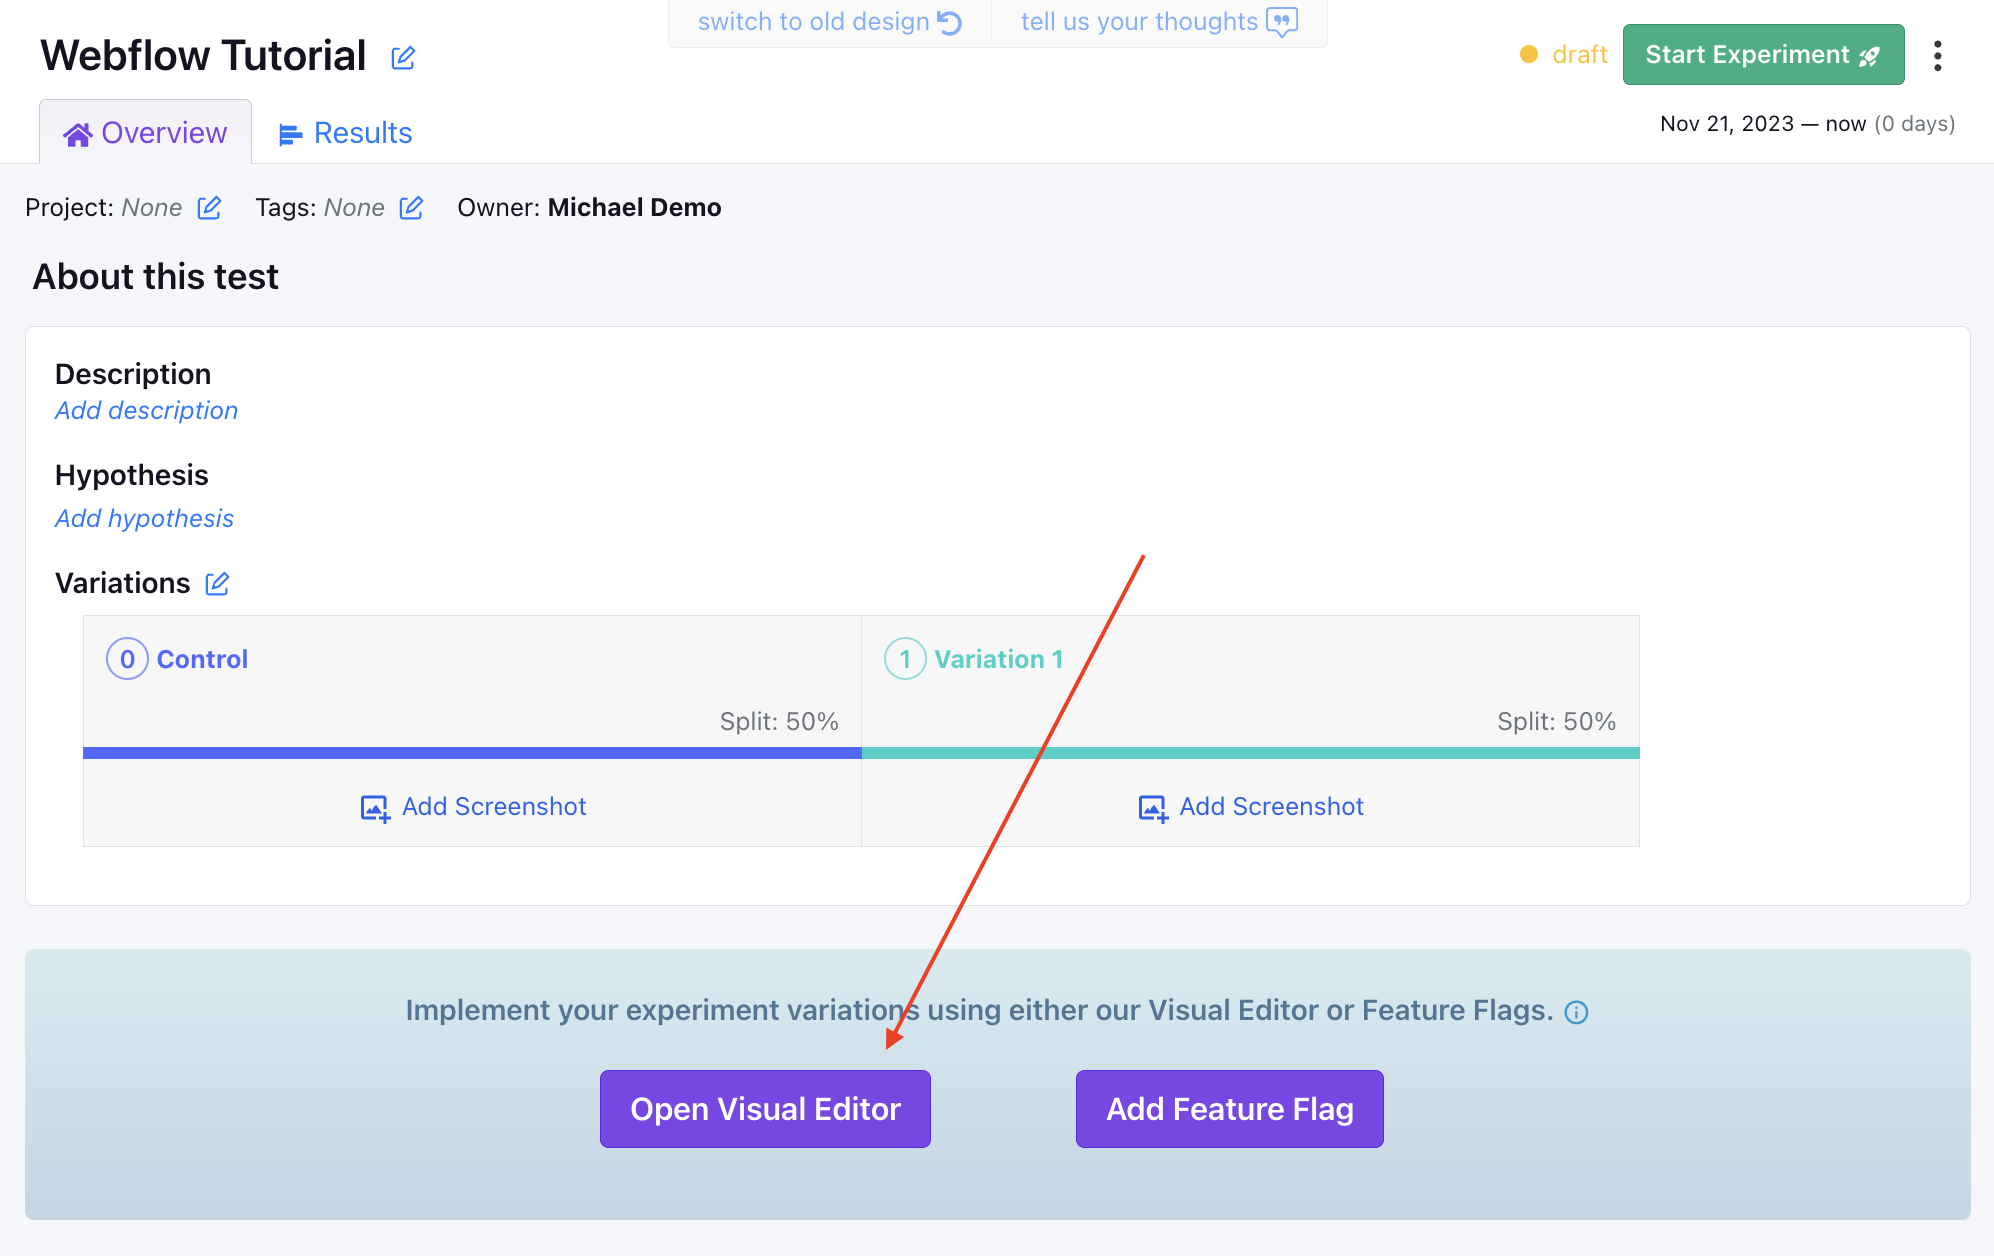 You'll then be redirected to your site, where you can use the Visual Editor to update your site's content.